Fed up of excited pugs and other furry beasts getting their paws caught on trailing controller leads and pulling your console off the shelf? Here’s something that could be the solution.
If there’s one thing that I don’t miss from retro consoles, it’s wired controllers. I’ve gotten so used to playing with wireless pads, ever since the Gamecube’s excellent Wavebird, all the way up to the Xbox One’s super comfortable controller, that going back to trailing leads is a pain the arse – Especially when you have pets that love to walk around.
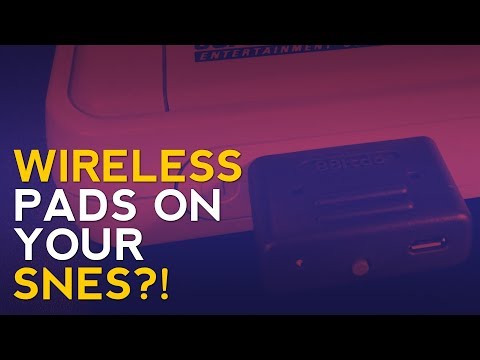
8bitdo are a company that are doing great things for old consoles, and the Retro Receiver is one of their many accessories for classic systems. Basically, it’s a Bluetooth controller receiver for your Super Nintendo or Super Famicom system, but it’s also available for the Nintendo Entertainment System as well as the NES and SNES Classic Mini systems.
8bitdo claims it works with a multitude of wireless controllers, starting with their own extensive range of wireless pads – But if you don’t have those, a whole load of controllers for other consoles are supported. If you’ve got a Dual Shock 3, Dual Shock 4, Wii Remote, Wii U Pro Controller, Switch Pro Controller or even Switch JoyCon, then you’ve got a pad that’ll connect with the Retro Receiver and can be used on your Super Nintendo.
And it’s the simplest thing to configure too. In the easy to open packaging, you’ll get your Retro Receiver, a tiny USB cable and a keyring for some reason. The first thing you’ll want to do is go to 8bitdo’s Support site, download the manual and also the latest firmware updater for your Retro Receiver for your PC or Mac. Yes, they have Mac software – Hooray!
Load up the firmware updater on your computer, then hold the Pairing button on your Retro Receiver before plugging it into your computer via the included USB cable. Click the Update button, browse to the latest firmware update that you downloaded, then after a few seconds you’ll be up to date and your Retro Receiver is ready to use.
Once you’ve plugged your Retro Receiver into your Super Nintendo or Super Famicom console, the toughest part of the whole process is deciding what controller to use. If you’re using a Wii Remote, Wii U Pro Controller, Switch JoyCon or Switch Pro Controller, press the Pairing button on your Retro Receiver while it’s plugged in and your console is switched on. Then, while the Blue light is flashing on the Retro Receiver, press the pairing button on your controller, and after a few seconds everything should pair and you’ll be ready to go.
For Dual Shock 4 users, you’ll need to press and hold the Share and PS buttons on your pad to pair it to the receiver. From that point, you can press the PS button to turn the pad on and play.
If you’re using a Dual Shock 3 controller, you’ll need to download the Receiver Tool from 8bitdo’s for your PC or Mac. Load it up and again you’ll need to hold the pairing button on your Retro Receiver while plugging it in via USB. Then, you’ll need to connect your Dual Shock 3 controller to your computer via USB cable. Click the Pair button in the Receiver Tool, and your Receiver and controller are now paired and ready to use.
It takes a few seconds to a couple of minutes to set everything up, and it just works after that. I’ve been using my Wii U Pro Controller over the last week, and all I’ve needed to do is turn my Super Nintendo on, press any button on the Wii U Pro Controller, and it all repairs again in a matter of seconds. It’s easy.
But what about input lag? Well, I’ve not noticed any. I’ve been playing a lot of Yoshi’s Island recently on a CRT television, and I can’t say I’ve experienced any sort of delay between a press of the button and what happens on screen. As I’ve said before, it just works.
For less than £20, the Retro Receiver is a handy little adaptor that allows you to free yourself from the shackles of wires. It’s simple to use, takes very little effort to set up, and I can’t find any fault with it, other than the fact it doesn’t come with instructions in the box. But, it’s not like the instructions are difficult to find on 8bitdo’s site, which you’ll want to do anyway to update the firmware.
Ultimately, I love this little device, and it comes highly recommended from me. I’ll definitely be picking up a receiver for my Nintendo Entertainment System – I just wish there was one for every classic system.
